Top Shopify customisations you need | Shopify Development tutorial
Have you ever been curious about how suddenly so many e-commerce companies and online stores are launching after the pandemic? How all of a sudden it becomes so easy that a beginner or any non-tech person can just launch his store and become a founder? All that is happening because of the super quick and […]
The post Top Shopify customisations you need | Shopify Development tutorial appeared first on Computer Service Solutions.
Have you ever been curious about how suddenly so many e-commerce companies and online stores are launching after the pandemic? How all of a sudden it becomes so easy that a beginner or any non-tech person can just launch his store and become a founder? All that is happening because of the super quick and user-friendly drag-and-drop design and development features provided by WordPress and Shopify.
These platforms provide easy store setup features and even a non-tech person can easily use the tools to make their stores.
But wait what? Nothing is perfect my friend, all these easy and quickly accessible features also have a drawback. The drawback is the lack of customisation with both of them for any person who doesn’t know how to code. Yes, you heard it right, If don’t know how to code, it might gonna be very difficult for you to customise it for your brand and hence, either you might end up using the basic theme-based designs and features or spending too much of your budget on the plugins and extension for even basic customisations.
In this article, I will provide you the tutorial on some of the must-have Shopify customisations you need to upsell, make your brand look better and different from others
So let us start from the pre-requisites
Pre-requisite
- We are using the Shopify plan of 29$ per month
- The theme installed on the website is Dawn
- The Payment Gateway we are using is Razorpay
- We would need the Razorpay login credentials. We are assuming your Razorpay is already connected with the website.
- We have Shiprocket as our shipping partner and we will automate the entire process of receiving the order to sending it to Shiprocket
1. How to add different discounts for prepaid orders in Shopify?
If you have used Shopify before, you might know that Shopify never allows two different discounts for COD and prepaid orders. That’s because in such a case, there will be a dependency on 3rd party companies and a lot of resources might be used. So what’s the alternative?
In our case, we are using Razorpay, so we will be doing the implementation of this on the Razorpay side instead of Shopify.
Why?
Because the prepaid transactions will only be possible through the payment gateway and if we are using Razorpay then doing them there makes a lot of sense and saves data transactions and resources at the shopfy end.
Adding discount on prepaid payment in Shopify with Razorpay for domestic payments step-by-step guide
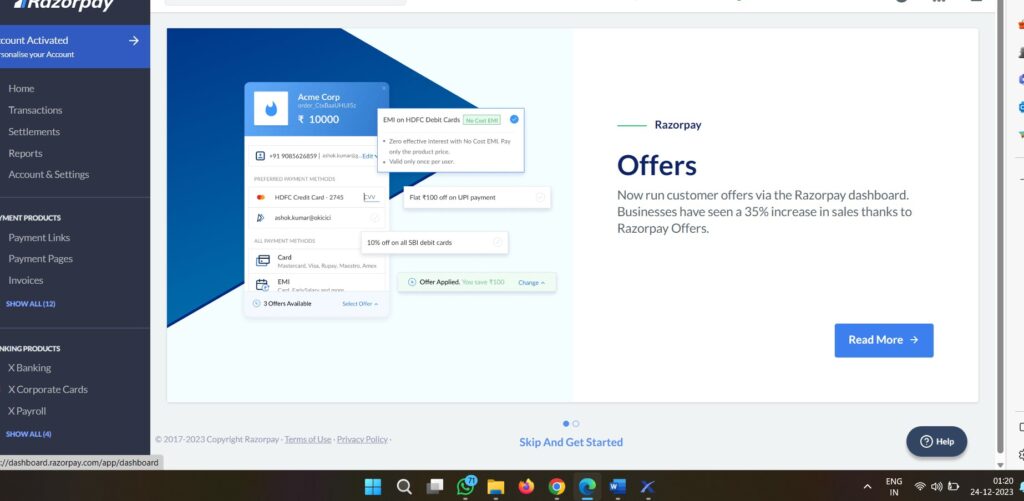
- Login to your Razorpay dashboard.

2. On the landing page, you will find the menu on the left side. Scroll a bit to navigate to “Offers”
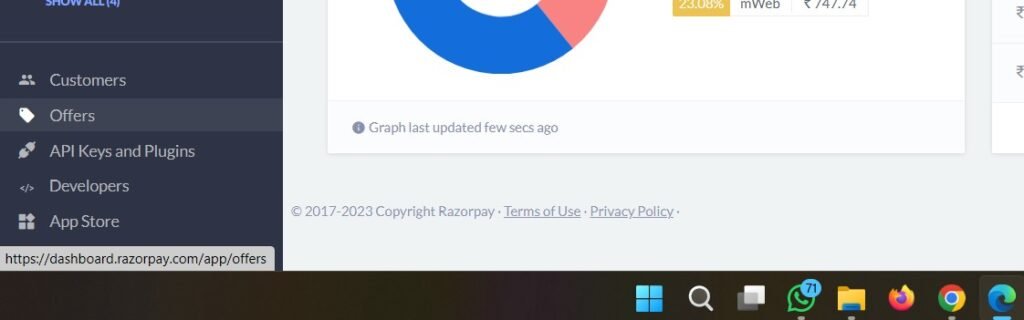
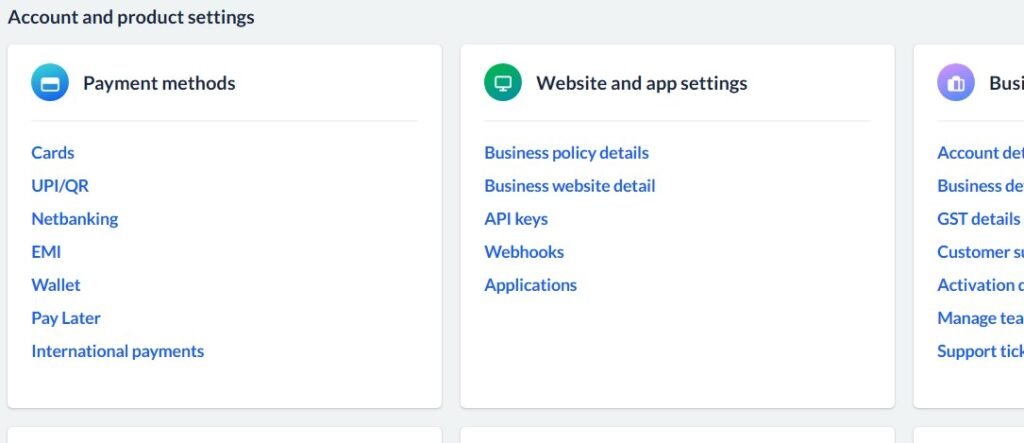
3. We will play here. But before that, let us check how many payment methods provided by Razorpay, we are using.
4. To do that, you can either go to settings and then payment methods and check or test your website front end too.
5. Now going back to the “offers section”, we will create a new discount offer here. Click on “Create new offer”.
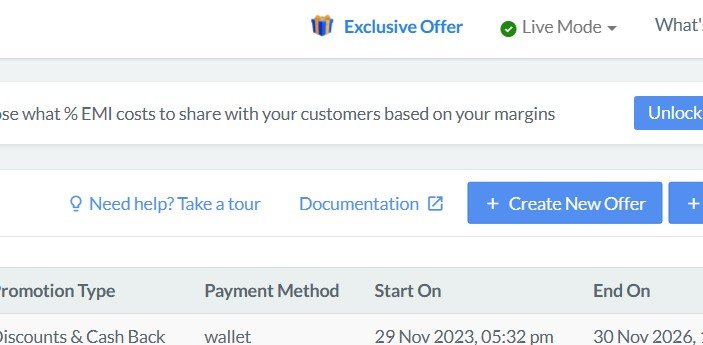
6. Choose discounts & cashback and a new popup will appear.
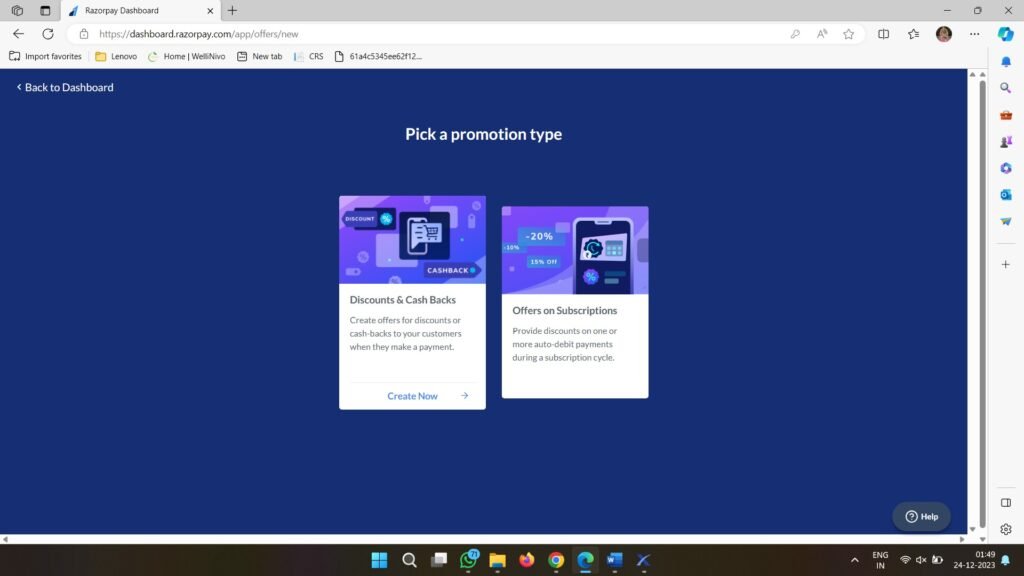
7. Here we have to give the essential details like the total discount we are offering or the percentage of discount on cart value we are offering, start date, end date,
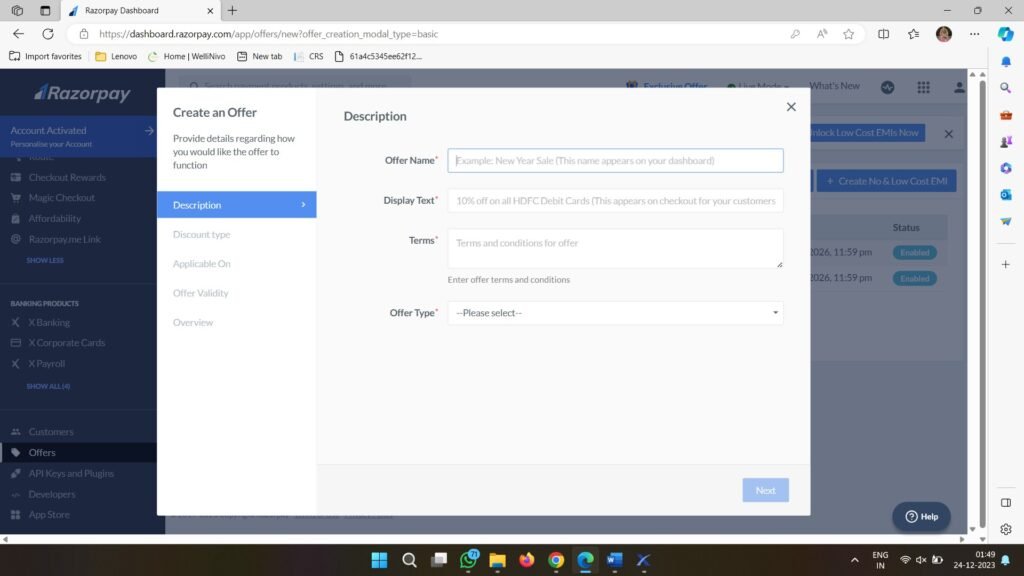
8. Once you submit all details, check the terms and conditions and click “create offer”
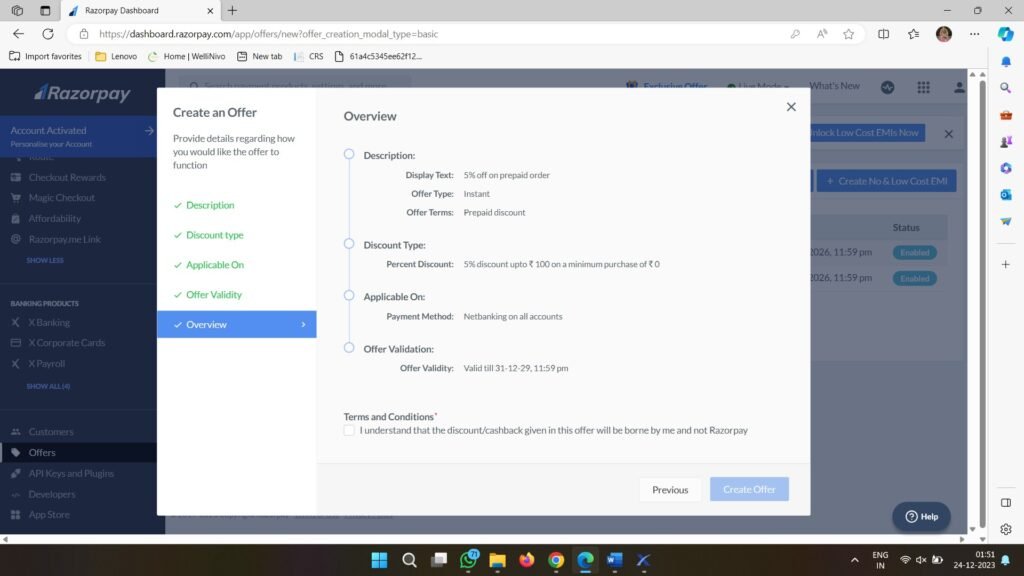
Woohoo! The prepaid discount offer was created. Shopify! you denied me, no worries, I can make my way.
2. How to make the entire slideshow area clickable without using a button in Shopify?
In a Shopify dawn theme, (which is one of the most used current official themes across the globe) customising the slideshow banner is not supported by the customiser drag-and-drop feature. It only gives the heading text and button format which is a bit traditional. A lot of brands require their entire slideshow to be a clickable CTA redirecting to different links. So in just a very small step, we will be doing that here.
1. Go to the slideshow.liquid
2. Find the main slider component where it is starting and keep that in the anchor tag using this code.

<a href="{{ block.settings.link }}" style="position: absolute;left: 0;top: 0;width: 100%;height: 100%; z-index: 2;display: block"></a>3. Then save, and it will work
3. Hiding certain collections from the main category/collection page in Shopify
A lot of e-commerce giants or companies create different collections for each category of their products. For example, a shirt brand might have collections like casual shirts, formal shirts, full-sleeves, half sleeves. At the same time, they definitely would have collections for their homepage, like best sellers, trending shirts, etc.
Now, the problem here is that as a brand, you don’t want these best sellers, latest shirts categories or collections to come on the all-product category page. But Shopify doesn’t allow this directly without code. Then, how do you hide certain collections from the main collection page in Shopify? Don’t stress, buddy, I have explained this below:
1. Log in to the backend and go to the theme section in the sales channel menu.

2. Here you will see the theme you are using. Just click on 3 dots and choose edit code.
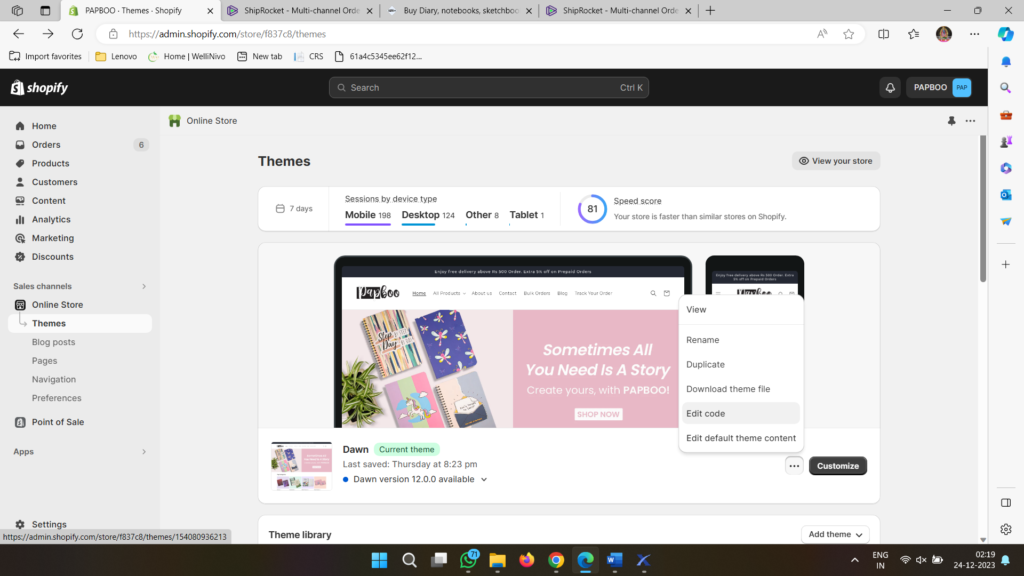
3. Navigate to a file called main-list-collection.liquid and around lines 31-35 you will find something like
 {%- for collection in collections -%}
{% else %}
      <li class="collection-list__item grid__item{% if settings.animations_reveal_on_scroll %} scroll-trigger animate--slide-in{% endif %}"
          {% if settings.animations_reveal_on_scroll %}
            data-cascade
            style="--animation-order: {{ forloop.index }};"
          {% endif %} >
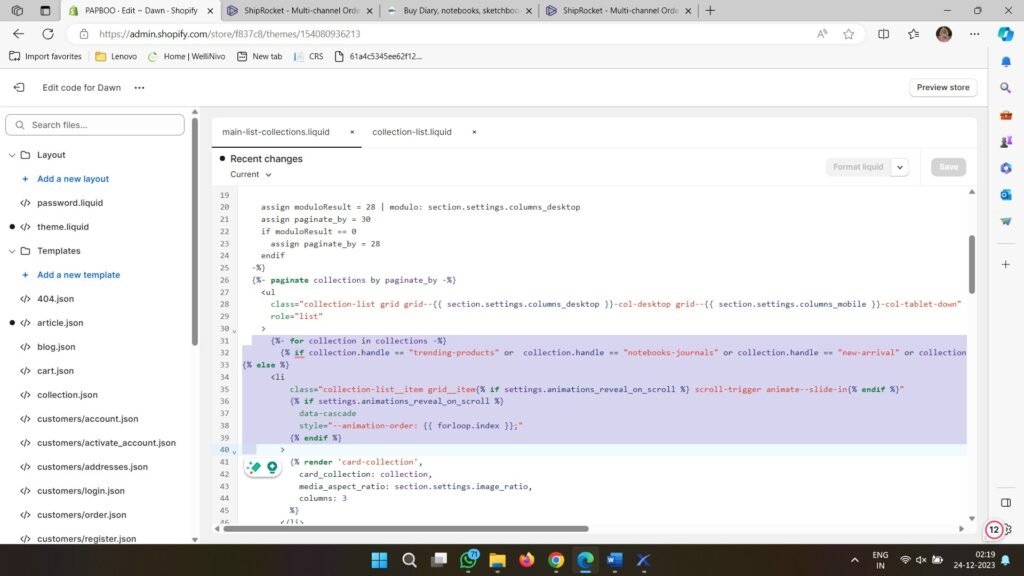
4. Here in the main if statement for collection we will be giving the code
{% if collection.handle == "trending-products" or collection.handle == "new-arrival" or collection.handle == "best-sellers" or collection.handle == "homepage" %}5. Save your code and check on the collection page, this won’t be available
What we have done here?
The “for” loop starts here to display the list of collections, so we have just used an “if” condition with multiple “OR” statements and hardcoded those collections. If the collection is trending or best sellers skip and else print.
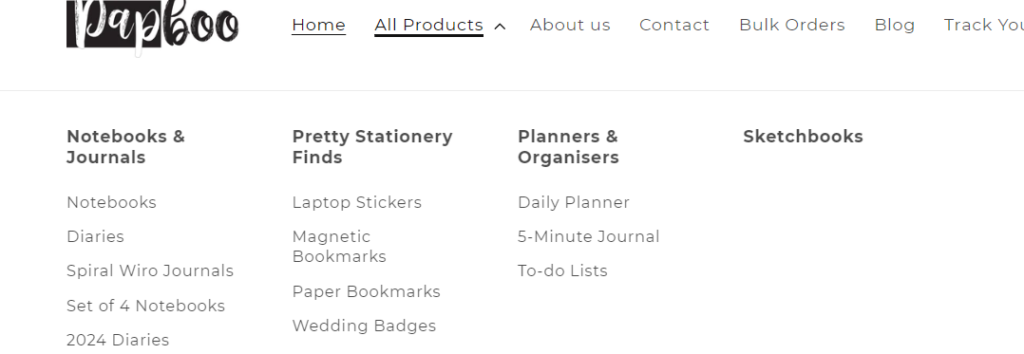
4. Making Megamenu items and sub-items identifiable parent-child
In the Dawn theme, when you create a mega menu having a 4-column with the main item and each item having 4-5 sub-items or products. Then in the current default theme, there is no way a user can understand that the main item has a sub-item
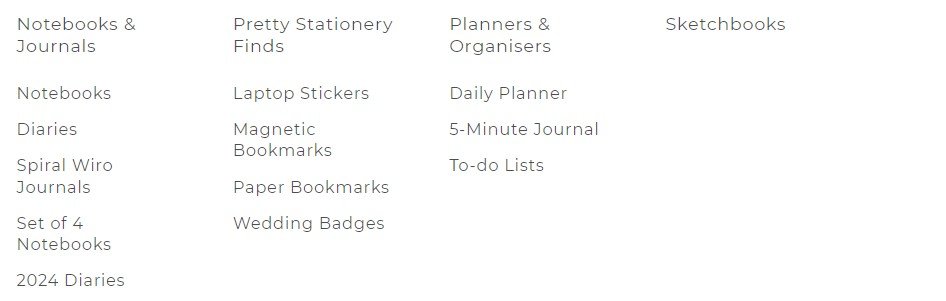
We will be adding a custom CSS for this menu to make it look like a real menu-submenu look. You can inspect the element and then get the class of a particular element. In our case, the class is mega-menu__link–level-2. I have added a new style to the parent element using font-weight.

.mega-menu__link--level-2 {
  font-weight: 600;
}
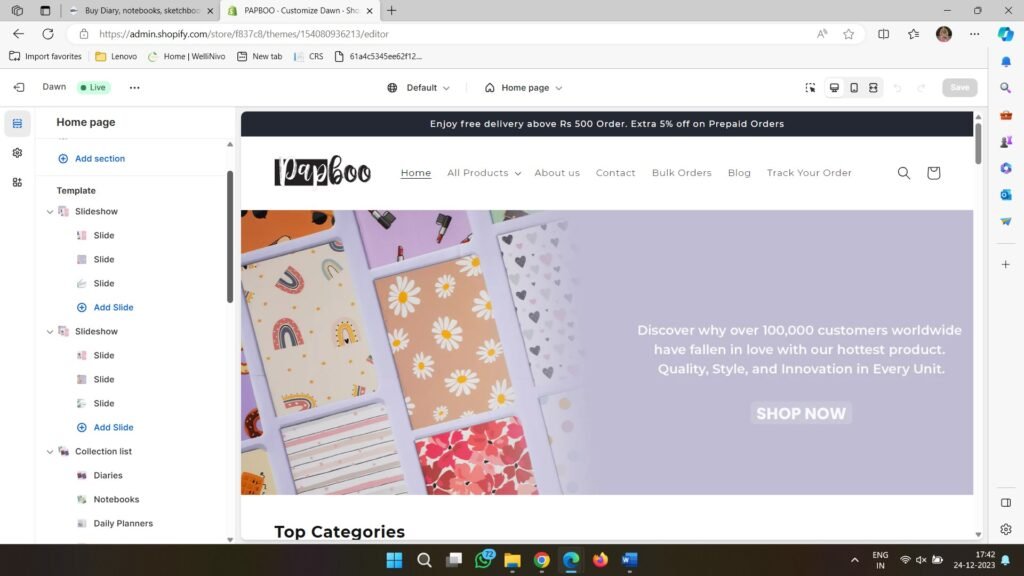
5. How to have a different slider banner for desktop and mobile in Shopify?
By default, Shopify has the same global settings for both slideshows in mobile view and desktop view if you have the same images. It sometimes creates a problem when you need different sizes in both devices and crop images or change button locations.
In such situations, what you can do is make 2 different sliders for both devices. How to do that, let’s explore.
1. Go to Customizer and create your slideshows there.
2. Now we will be checking their CSS IDs in the inspect element in Chrome
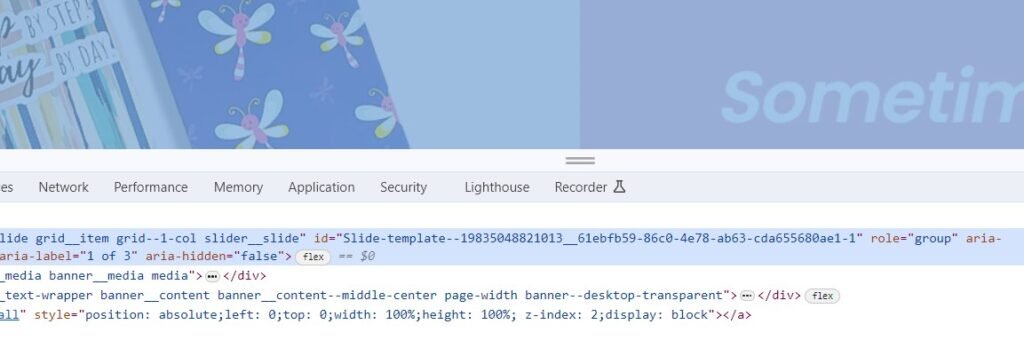
3. We can get IDs of both sliders in this manner.
4. Go to the theme editor->edit code->base.css and in the end add the following additional CSS properties
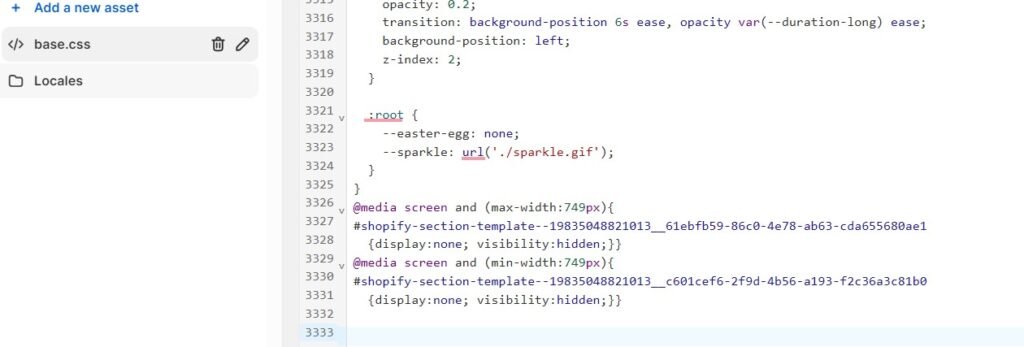
These are few customisations that can help you make the most of your Shopify store in easy steps. I will keep adding more and more to it with time, till then keep reading.
You can also consult me for your shopify website development in Uttam Nagar
Also check our facebook phishing tutorial
The post Top Shopify customisations you need | Shopify Development tutorial appeared first on Computer Service Solutions.